I have lost many hours of sleep because of not being able to set up PHP and Apache. I have missed homework deadlines, fallen asleep in class, accidentally eaten an onion, and much worse. Here is my attempt to help you guys sleep at night with a very quick and easy PHP and Apache installation guide. (This is for
Windows ONLY. I don't know anything about linux or mac, I'm sorry. I'm using vista 32 for this tutorial)
To make sure this works, I've uninstalled my webserver, and I'll be installing it right along side you.
UPDATE:
Although this installation is for Apache 2.2.14 and PHP 5.3.1, I've personally confirmed this exact installation guide works for Apache 2.2.17 and PHP 5.3.3.
UPDATE: Windows 7 Users
I've verified that this setup works for Windows 7 Ultimate 64 Bit.
General Rule of Thumb
If you have a choice between installing everything manually or using a packaged installer to do it all for you,
ALWAYS ALWAYS INSTALL IT MANUALLY!
So far, the packaged installers are always missing files, and the configurations are completely screwed up. Although the task of manual installation with zip files seems extremely daunting, it's actually MUCH easier to work with. And besides, you've got someone to walk you through the process :)
Also, take note of which direction the slashes are facing when I tell you what to type in. That is also extremely important.
The Order of Business
Apache
PHP
Installing Apache Webserver
In this case, we get to use an MSI installer. Setting up Apache and MySQL are the easy parts. It's setting up PHP that made me lose all that precious sleep.
Step 1)Make a folder called "webserver" on your C:\ drive.
 Step 2)
Visit
The Apache Download Page. The version I will be installing in this tutorial is 2.2.14. Scroll down until you see
"Win32 Binary including OpenSSL 0.9.8k (MSI Installer)" and then click the download link right beside it.
 Step 3)
After the installation file has finished downloading, run it. Accept all the terms and whatnot, but stop when you get to the server information.
 Step 4)
For both the Network Domain and Server Name, type in localhost. For the email just put your email. I also have "for all users , on Port 80, as a service" selected. Click next.
 Step 5)
Select Custom Install and click next.
 Step 6)
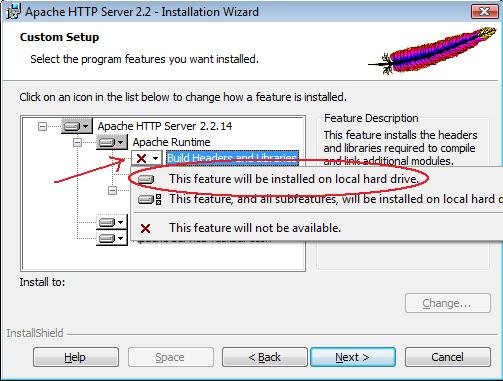
You'll notice a red X by "Build Headers and Libraries". Click the dropdown menu by the X and select "This feature will be installed on local hard drive"
 Step 7)
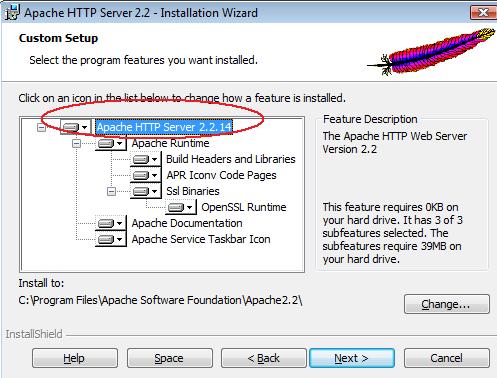
Click on Apache HTTP Server 2.2.14 on top and make sure it's highlighted. This is to make sure when we specify our installation location in the next step, we aren't just specifying a component of the webserver; we want to move the WHOLE thing.
 Step 8 )
Click on change to bring up the window to change the installation path.
 Step 9)
In the folder name text box, type in C:\webserver, and click Ok. Then click next and begin the installation.
 Step 10)
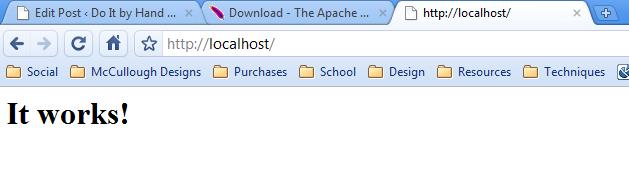
After the installation has completed, go into a browser and type in localhost as the URL. If it the installation worked...well, Apache will tell you. :)
That wasn't so bad! Now on to the sleep depriving monster
PHP
These steps will help you install PHP onto your webserver. We will be using manual installation for this.
Step 1)Visit
The PHP Downloads Page. The version of PHP I'll be installing is PHP 5.3 (5.3.1). Download the
THREAD SAFE zip file.
 Step 2)
After the download has finished, extract the files to C:\webserver\php
Step 3)Locate the PHP folder and open it. Look for a file called php.ini-development. Once you have found it, rename it to php.ini Windows will tell you that changing the file extension may cause it to become unusable. Change it anyway.
 Step 4)
Open up php.ini in notepad.
Step 5)Do a search (CTRL+F) for the phrase "doc_root" (omit quotations). After the = sign, type in "C:\webserver\htdocs" (INCLUDE quotes). Your text file should look like this.
 Step 6)
Scroll down until you see
; Directory in which the loadable extensions (modules) reside.
; http://php.net/extension-dir
; extension_dir = "./"
; On windows:
; extension_dir = "ext"
Not too far below where we just were. Delete the semicolon in front of the line
; extension_dir = "ext"
Then replace "ext" with "C:\webserver\php\ext"
Your file should resemble this.
 Step 7)
Save and Close the php.ini file. Now go back to the C:\webserver directory. Open up the "conf" file.
 Step 8)
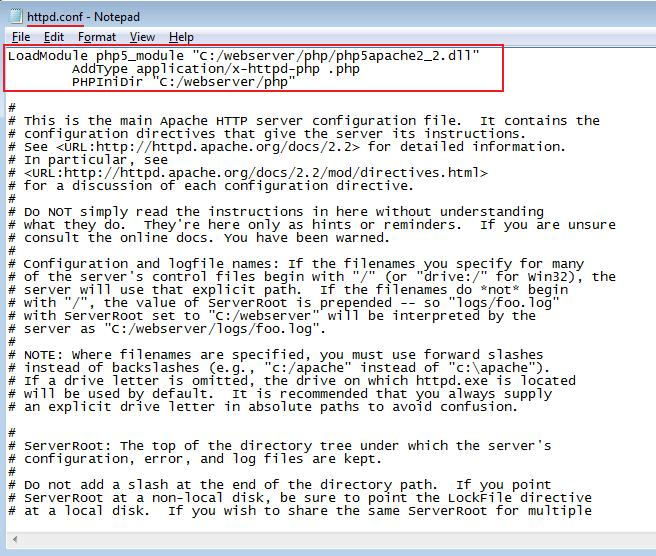
Open the httpd.conf file with notepad. Copy and paste the following to the top of the file
LoadModule php5_module "C:/webserver/php/php5apache2_2.dll"
AddType application/x-httpd-php .php
PHPIniDir "C:/webserver/php"
This tells the webserver what files to load for php and where to locate the php configuration file.
Make sure a # does not appear until after the block of text you have pasted.
We're almost there!
Now we just have a lot of copying and pasting to do.
In the event you're unable to find one of the files this tutorial references, make sure to go back and verify you downloaded the right file. If you don't download the thread-safe version of PHP, for example, many of the dll files this guide references will be missing.
Update:
I've confirmed that the installation works without all this copying and pasting. You can skip to step 12 for now. If your installation fails to work, you can try these steps.
Step 9)Open the C:\webserver\php directory. Look for the file called php5apache2_2.dll. Copy and paste it into C:\windows\system32
Step 10)Copy php.ini from C:\webserver\php into C:\windows and C:\windows\system32
Step 11)Copy all the contents of C:\webserver\php\ext into C:\windows\system32
Step 12)This step will be composed of many steps.
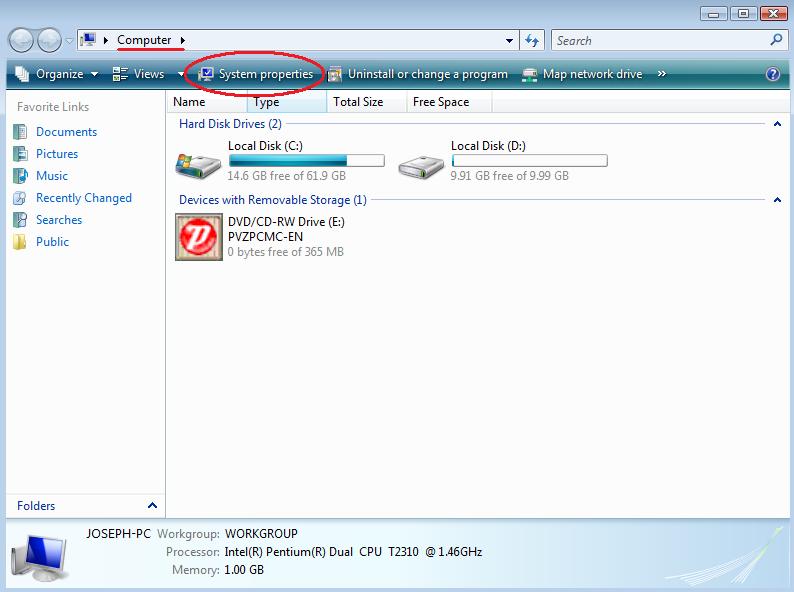
A) Open My Computer and click System Properties at the top. (If you do not see that option, you can also right click on My Computer and click Properties)
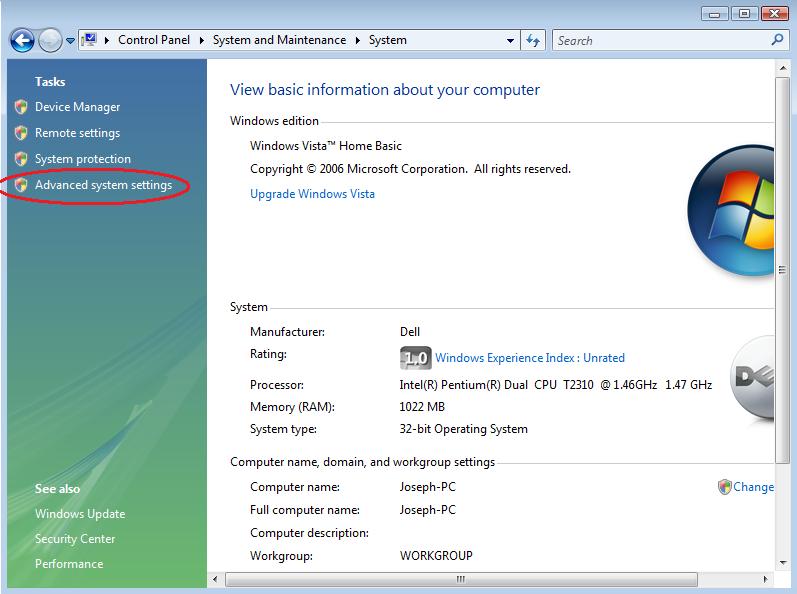
B) Click Advanced System Settings
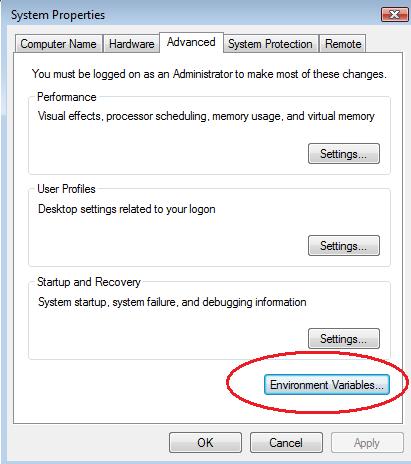
C) Click Environment Variables
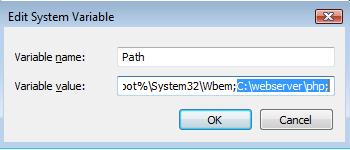
D) Under System Variables (The lower half of the screen), scroll down until you see the variable named Path. Click it and press Edit.

E) After the last semicolon in the variable value box, copy and paste C:\webserver\php; (Include the ending semicolon)
 You're done!
 Now it's time for testing.
Testing PHP and Apache
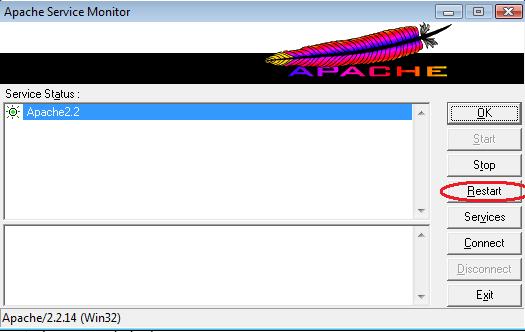
Be sure to restart your apache server. You can do this by right clicking on the apache icon in the system tray and clicking Open Apache Monitor (Or you can access the apache monitor from your Programs into the start menu). Select apache 2.2 and click restart. If you do not restart your webserver, PHP will not work until you restart your computer.
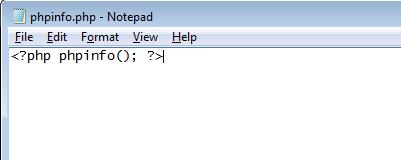
Open up notepad, and paste this in:
<?php phpinfo(); ?>
Save the file as phpinfo.php in the C:\webserver\htdocs directory.
Now open up your browser and type in localhost/phpinfo.php into the URL bar. Do NOT Type in C:\webserver\htdocs\phpinfo.php They are NOT treated the same way even if the path leads to the same file.
If you've followed everything correctly, you should see a screen full of your php information. This indicates that you can now perform server-side operations such as the execution of php scripts.

Please let me know if there are any errors with this tutorial, or if you have any questions. I want to make sure this is just about perfect so that people don't have to spend days and days trying to configure their first webserver. This whole process turned me off to learning php for a few months because I had already spent so much time failing to set up apache.
I will cover how to install and configure mysql, pear, and phpMyAdmin in an upcoming post.
February 21, 2010
